Timelapse video of two Scurry pages.
/files at my patreon: https://www.patreon.com/macsmith
files at my patreon: https://www.patreon.com/macsmith
Hey guys! I thought for Scurry's 6 month anniversary I'd post a little rundown of how I create my pages. First, I should say this isn't the way it always works out. Sometimes I do a step out of order, or work on a panel or two at a time, or get everything wrong and have to redo everything from scratch. My process is mostly chaos, but this is the basic way I do stuff.
This also isn't meant to be a full blown tutorial (I'll get to that one day), but just an overview. I won't get super detailed with how Photoshop works, or how to draw and paint. There are plenty of better tutorials out there that could explain it better than me. I've used Photoshop for well over a decade, so I've learned a lot of the ins and outs of the program. Of course, all the digital tricks in the world won't help you if you haven't studied drawing and painting (though many have tried). My best advice would be to get in there and experiment. Move the sliders, click the buttons, and screw up. You can always undo. That's how I learned. Except when I first started, Photoshop only had one undo!

Some notes:
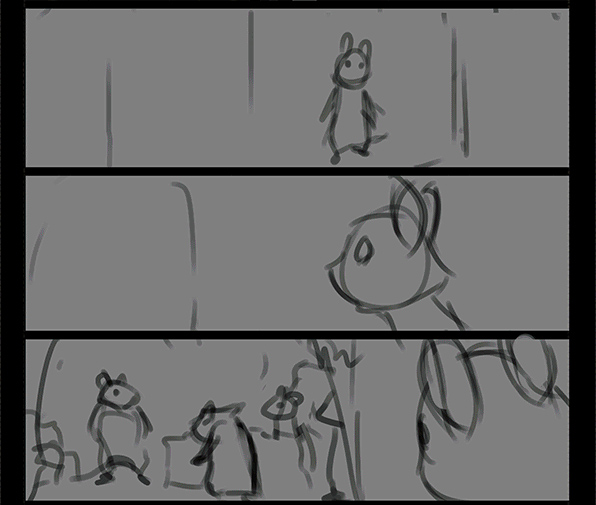
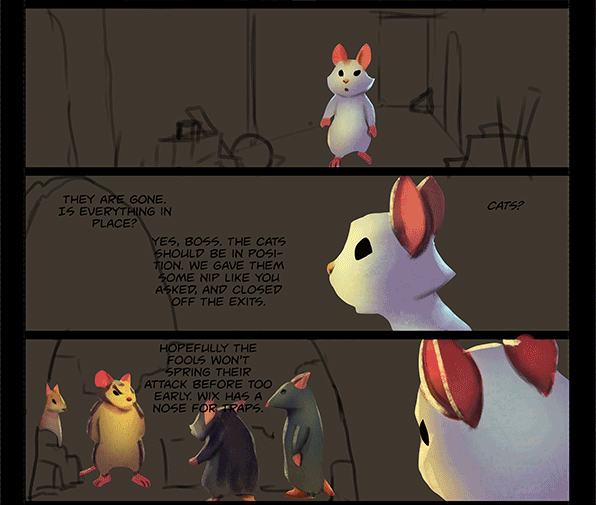
Step 1: Rough Sketch
Actually, this isn't the first step. Before this, I have to write the thing, then script the pages, then do some teeny tiny thumbnails of all the pages in an episode. The thumbnails are the only thing I do with pencil and paper, and I don't have any pics handy, but you get the idea. I can fit 9 thumbnails on a piece of 8 by 11 inch copy paper, so they are little more than chicken scratch.
Anyway, I block in the panels and crudely sketch in the characters and important background details. I'm not worried about great drawing, sometimes a smiley face will do. I'm mainly worried about getting in the information that is required and experimenting with different shots. I may do this step 2 or 3 times before I get it right.

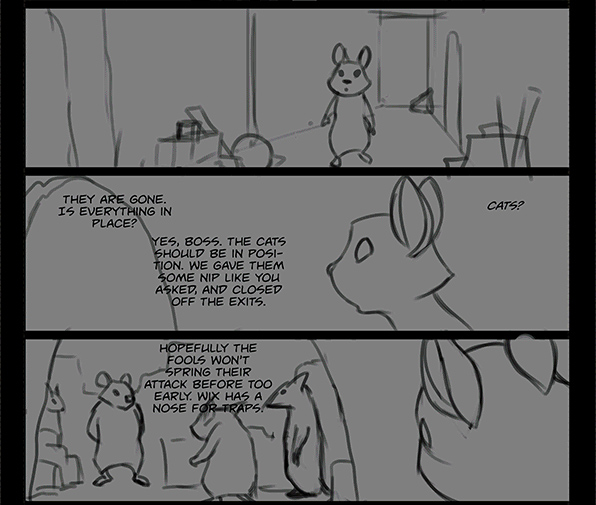
Step 2: First Lettering
I like to get started on the lettering right away. Don't wait until the end and realize you don't have any room left! I use a slightly larger font than most comics, so they take up a lot of space. I try to be as sparse with dialogue as possible. This ain't a talky book!
Over the course of working on the page, I'll constantly be tweaking the dialogue and moving bubbles around, so it's good to have them in early.
Step 3: Line Art
Next I'll start doing the line art for the page. I try to be more careful here, making sure everything is accurately placed and characters are on model. Since this is a painted comic and the lines won't make it to the end, I don't care much about fancy line quality or detailed shading like you see from many of the great comic artists. In fact, pretty lines can be a detriment later on, because of fear of painting over the lines. I prefer to leave them ugly so I can paint over them with no regrets!

Step 4: Masks
For this step and the next two, I do something similar to the way this guy does things. Check out that video for more info. My way is a bit sloppier and cruder, but it's basically the same.
This stage and the next are great "turn your brain off for a bit" steps. Great for taking a break between the complicated drawing and painting phases.
With the lasso tool, I'll select out each character (holding shift to add, and alt to subtract) and fill each of them with a random color. It doesn't matter what color, it just helps select them later on. I usually put each one on a separate layer and lock the transparency setting on each layer (the little checkerboard icon). That way I can only paint inside those masks.

Step 5: Flat Colors
Next, using a color script for each character, I'll paint in the local color of each character over the masks, not worrying about lighting at all. just plain color: pink ears, black eyes, colored fur, etc. Pretty easy. I also give the background a flat average color.
Step 7: Lighting
This bit can get pretty complicated. Watch the video I posted in step 5 for more details. It takes a little experience with layer modes, but it's not as complicated as it looks. Of course, you can always just paint things in any number of traditional ways, but this way helps me have more control over the lights and colors and helps me keep the pages consistent.
If the rim light is too bright, for example, I can darken it without altering the whole image. I use separate layers for main lights, bounce lights, crevice shadows, rim lights, subsurface scattering and more if I want. At first it can seem like a lot of extra work, but eventually it can save you time.
I'm still not worried about details. Just the basic forms and shapes.
Step 8: The Background Rough
Once I finally have the characters roughed out, I'll start painting in the background. Sometimes I'll use a free 3d program called Sketchup to make some blocky models, sometimes I'll work up the backgrounds the same way I do characters, and other times I'll just paint them in same as I would if I were working traditionally. For this page, I wanted to get that 80s animated DIsney/Bluth feel, so I just painted them. The lighting was a bit tricky. Took a few tries to get it right.

Step 9: Character Rendering
Still here? That's crazy. Anyway, now I'll finally get to painting and rendering out the details on the characters. This is the fun part for me. I flatten all my character layers down into one layer (still separate from the background) and paint away. This is just a first pass, but it may take many.

Step 10: Background Details
Next I'll go back to the background and paint on that for awhile. I'll go back and forth between the characters and background, but I try to keep them separate so that I'm free to cut out figures and move them around.

Step 11: Effects!
Almost there! Here I'll add the finishing touches. Little things like light rays, dust particles and motion blurs. It really makes the scene pop!

Step 12: Final comic book stuff
Now I'll finish up the lettering and draw in the speech balloons. I also redraw the panels to give them a unique wobbly look I like.
I also make any final tweaks to the artwork, and get it ready to post. I do these pages weeks in advance, so I will usually revise them later, but I try not to spend much time on revisions. Better to move on to the next page, and not obsess over the old ones!
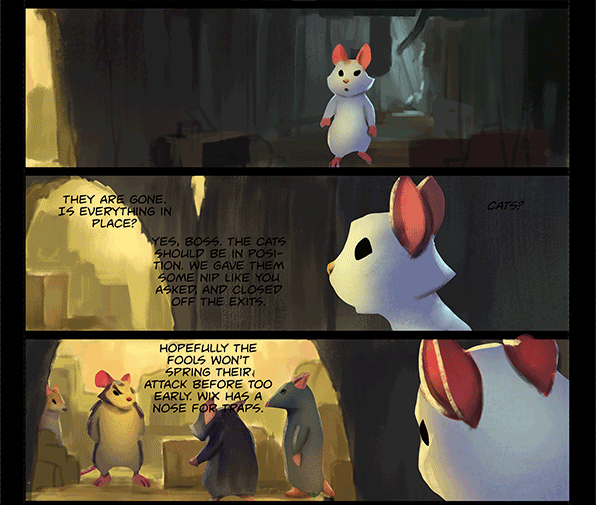
Final, without Lettering:

That's it! I know this might seem a bit daunting at first, but take your time. This isn't the fast way to do things. This is my crazy way to do things. You'll have your crazy way to do things, too. I started out just doing characters and little concepts for a few months to develop this way. But I also had many failed starts when I started working on the comic.
Anyway, enough blathering. I must sleep! Next I'll post a book list of good art knowledge.
All images and content ©Mac Smith 2015